User Guide
Here we are going to talk about how use django-spese to register our personal expenses.
To understand better the available operations, we need know the base concepts underlining this application. So first of all we’ll talk of General concepts.
Then we’ll see the Administration operations.
And finally we’ll see the details about Using it , where it means the application, of course.
Let’s start.
General concepts
Well, we said personal and expense. Two terms to think about.
Thinking to personal we get the first concept: every expense own someone.
Who is this one? The logged user.
Hence, to use django-spese we need login using a username
and a password. When we do it, the application will bind every
new expense to us.
Follow the second concept: I, logged user, can add and work on my expenses; but I cannot do something on somebody’s else expenses. Even I cannot see them.
Clarified the personal term implications, let’s see the expense term.
An expense means money to buy something. Where is money from?
Here we are at the third concept: in django-spese a source of money is called, well, source :)
A source could be a wallet, or a credit card, or a bank account or something else. Every expense is bound to a source from where money is kept to fulfil it.
As opposed from everyday world, here a source hasn’t limit: we can draw from it how much money as we wish. Or add to it.
Add? Yes, add. Why we could not add money instead of remove it? Forth concept: write positive numbers to add money to a source, and negative numbers to subtract money from the source. django-money don’t know how to subtract money, it knows only how to add it :)
Fifth concept: a source is bound to one, or more, user(s).
This means that every user could have one or more source(s). But is also possible a source could be shared between two or more users.
Sixth concept: every expense could be classified using one or more tag(s).
For example, maybe I wish classify my holidays expenses using the tag freetime, and the work expenses assigning them the work tag.
A last concept and we’re done. Seventh concept: it is possible tranfer money from one source to another. We call this kind of operation: tranfer funds.
It must be clear: transfer funds is a shortcut to save time. We could subtract (remember: use a negative number) from a source and add the same (positive) number to another source. But it’s a waste of time and it’s even a bit error prone: it isn’t so difficult write one of the two numbers with one more, or less, digit.
Since a picture is worth a thousand words, to summarize, please look at the figure below, which sum up the relationships between the exposed concepts.

As we can see, the most complex relations are between source and user, and between tag and expense. Technically speaking, these are m:n relationships. Every source could belong to more users and vice versa. Similarly for tag and expense.
The relationships user / expense and source /expense are much simpler: one user own more expenses, not viceversa. So between source and expense.
Ok. Now our global knowledge about django-spese is complete. We can start play around.
Administration
django-spese administrators are in charge to supply a simple but complete environment to application users.
To accomplish this target you use the URI http://127.0.0.1:8000/admin/ and login using the administrator’s username and password.
Base administration window looks as below, without the ellipses:

Red ellipses show the most interesting entities for our duties: user, source and tag.
Green ellipses show the shortcuts to add and change the target entity.
User interface is immediate, so I don’t explain it in detail. Only, I wish underline two points.
First. It isn’t possible to know an existing user password. We can only reset it to a known value. To do so, select user entity, from the next users list select the desidered user, and then use link underlined with red ellipse in the picture below.

Second. When working on sources, remember: a source could be shared between different users. So the pertinent window looks like below:

Here red ellipse remember us the possibility to bind a single source to more users.
It’s important bind the source to the correct user, and be aware to share sources that are truly shared between different users. I.e. let’s to keep again the previous picture. There we have cache shared between user1 and user2. This means that this two users have the same cache: see it as a shared wallet!
If I wish model a situation where user1 and user2 have different wallets, I must create them (for sake of example let’s say cache1 and cache2) and assign either of them to a single user (to complete the example: bind cache1 to user1 and cache2 to user2).
A last word about tags. These are the folders used to classify our expense. So I urge you to create a tag set limited in size, that fit well with your necessities. It’s a difficult matter change classification criterions while running :)
Using it
And now, provided of user’s username and password, finally we can login visiting http://127.0.0.1:8000/spese/.
Home page welcome us, showing the list of our expenses:

Hereafter we call this window as home, even if the true home is the project home. But we need to focus on our application, so we call home this one.
In the previous figure we highlight the presence of two different menues: the project menu and the the django-spese menu.
Project menu depends on your project. The previous figure shows the one you obtain from the django-spese repository. It’s there only as a demo to host our application.
We are concerned about the django-spese menu. At home we have two voices:
- add adding us a new expense;
- transfer funds to realize a transfer of money from one source to another.
If we click on an expense desciption, we’ll get its detail:

and from there we can:
- add to insert a new expense (this is the same menu voice from home);
- change to edit the expense characteristics;
- toggle to change the amount sign of the expense;
- delete to remove the expense.
Adding expenses
At home, selecting the django-spese menu voice add we obtain a form to input an entirely new expense:

Here we can select the desidered source, write the date, description and amount. And we can choose between the showned tags to categorize our expense.
When we are done, we can save and return to home, using the save button. Or we can save and add again a new expense, using the save & continue button.
To leave the form without creating a new expense, simply use the browser’s back button, or visit the home URL.
Changing expense
As we said, at home, selecting an expense, we obtain the expense detail window.
Here we can choose the change menu voice getting a form to change the expense characteristics:
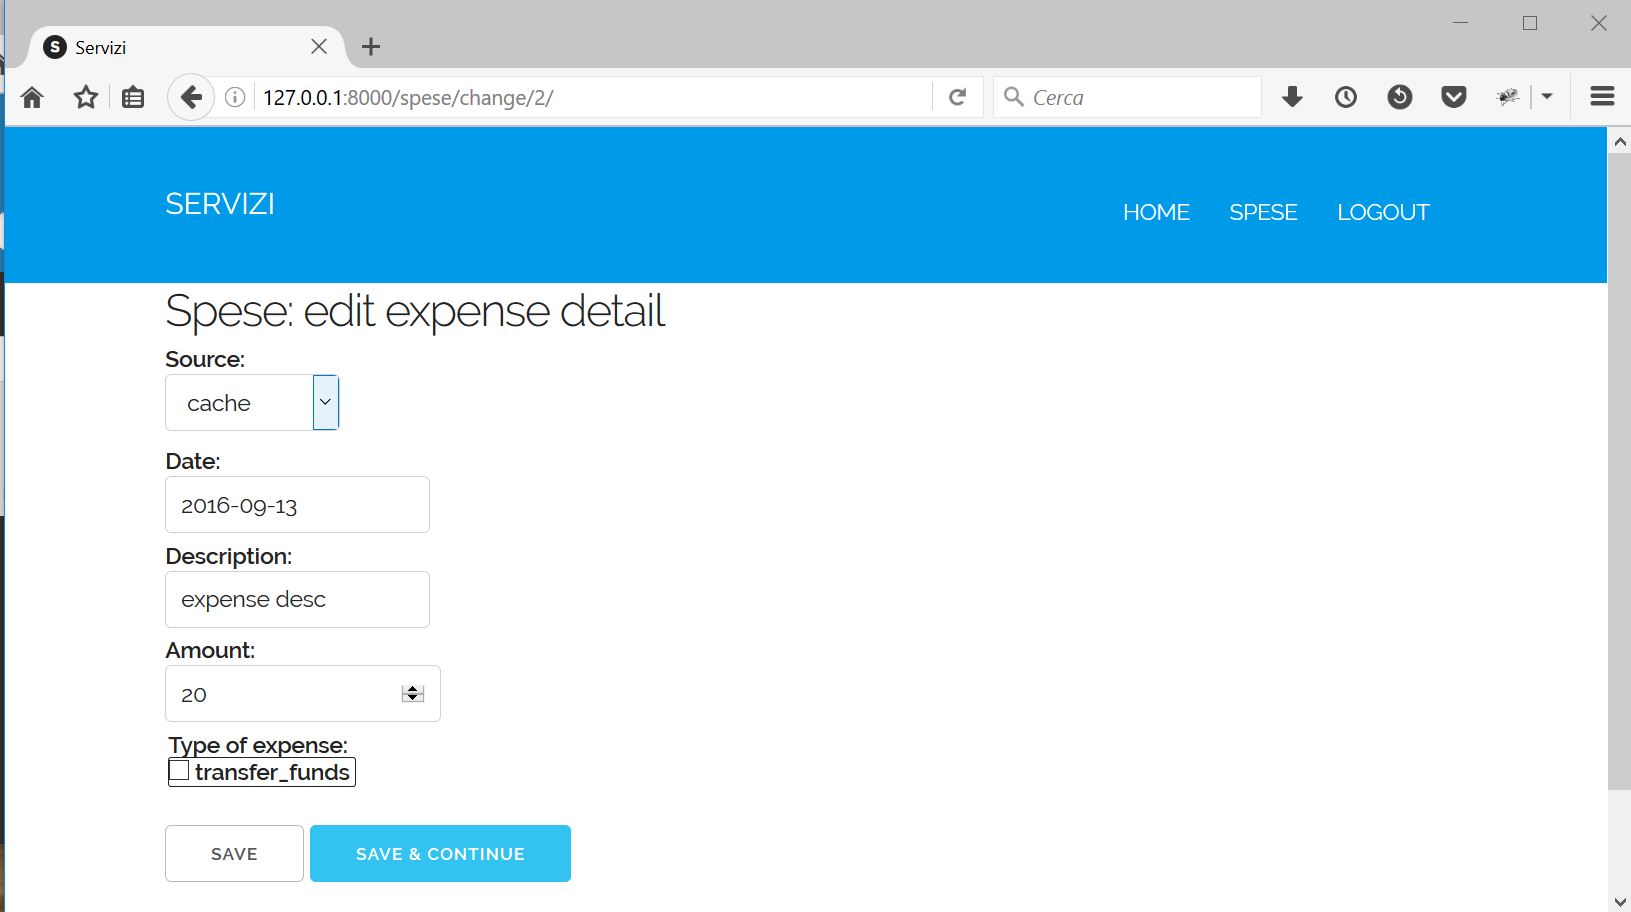
In this form we can change whatever we wish. To save changes, we must push the save button, moving us to detail again. Or we can choose the save & continue button, that keep us on the current change form.
Toggling expense
From the detail window, we can choose the toggle menu voice.
If we hit this voice, the application change the sign of the amount of the displayed espense.
This action is immediatly shown. We can observe:
- a (hopefully) confirming message after the spese’s menu area;
- the new amount of the expense, with the same quantity, but opposite sign.
Deleting expense
In the expense detail window there is another, very dangerous, menu voice: delete.
As we can imagine, this voice remove the showed expense.
Warning
What you don’t know is that, by now, this operation don’t ask for confirmation.
If we choose to delete the current expense this is what we immediatly obtain.
Transfer funds
At home, selecting the django-spese menu voice transfer funds we obtain the shortcut to transfer money from a source to another:
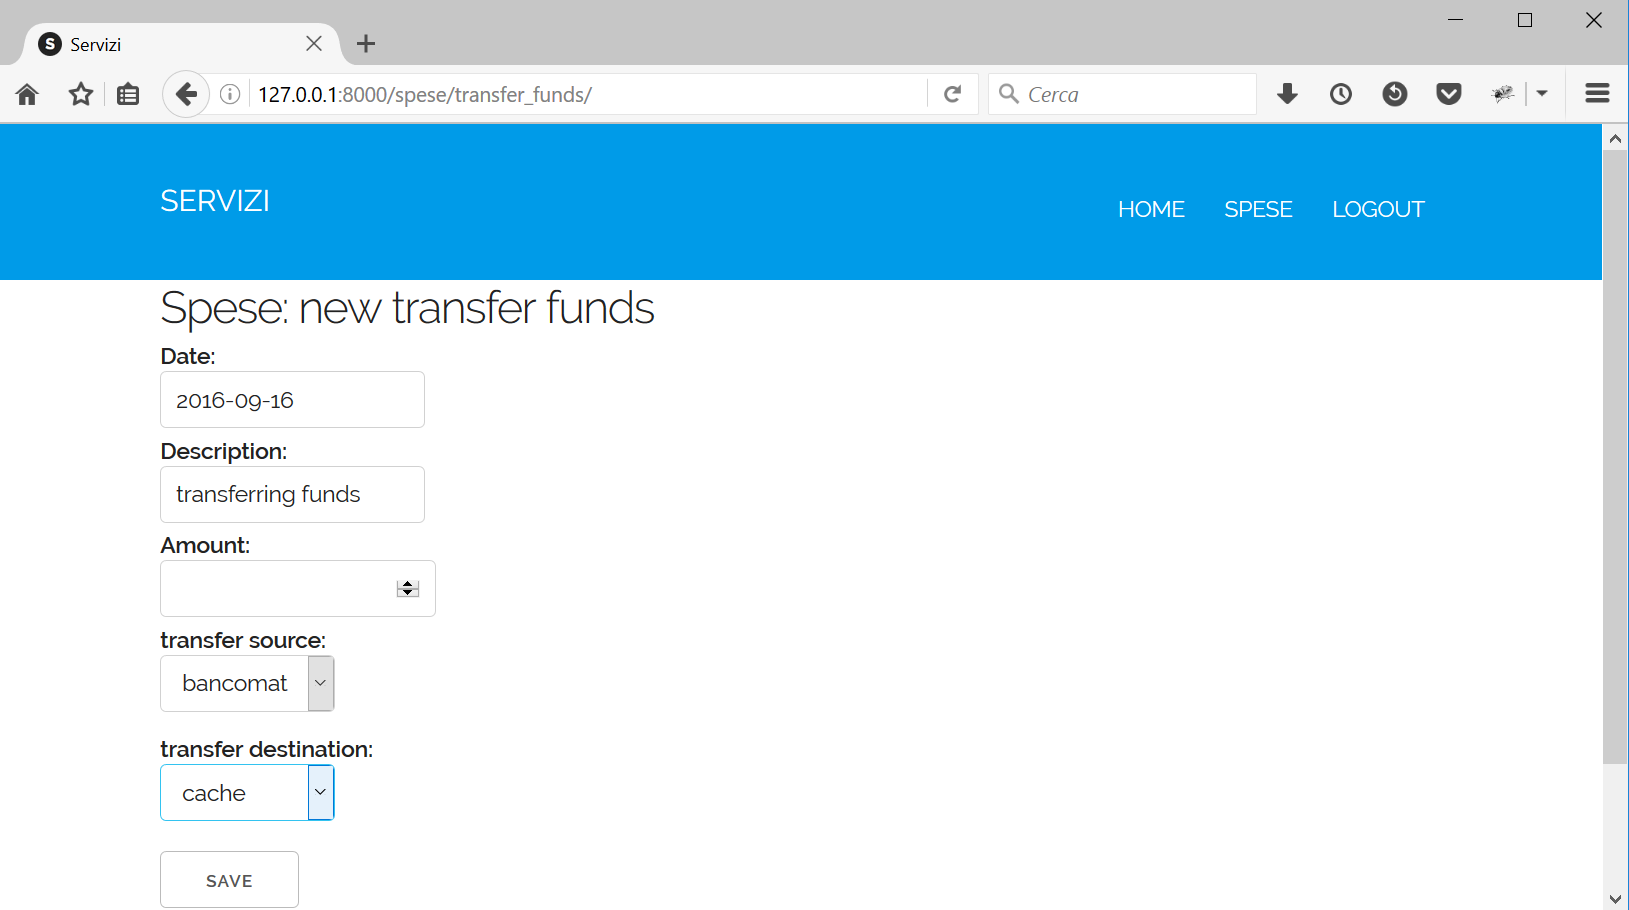
As usual: we must compile the form with the appropiate values. Then choosing the save button we get the desired operation: the amount is subtracted from tranfer source and added to transfer destination.